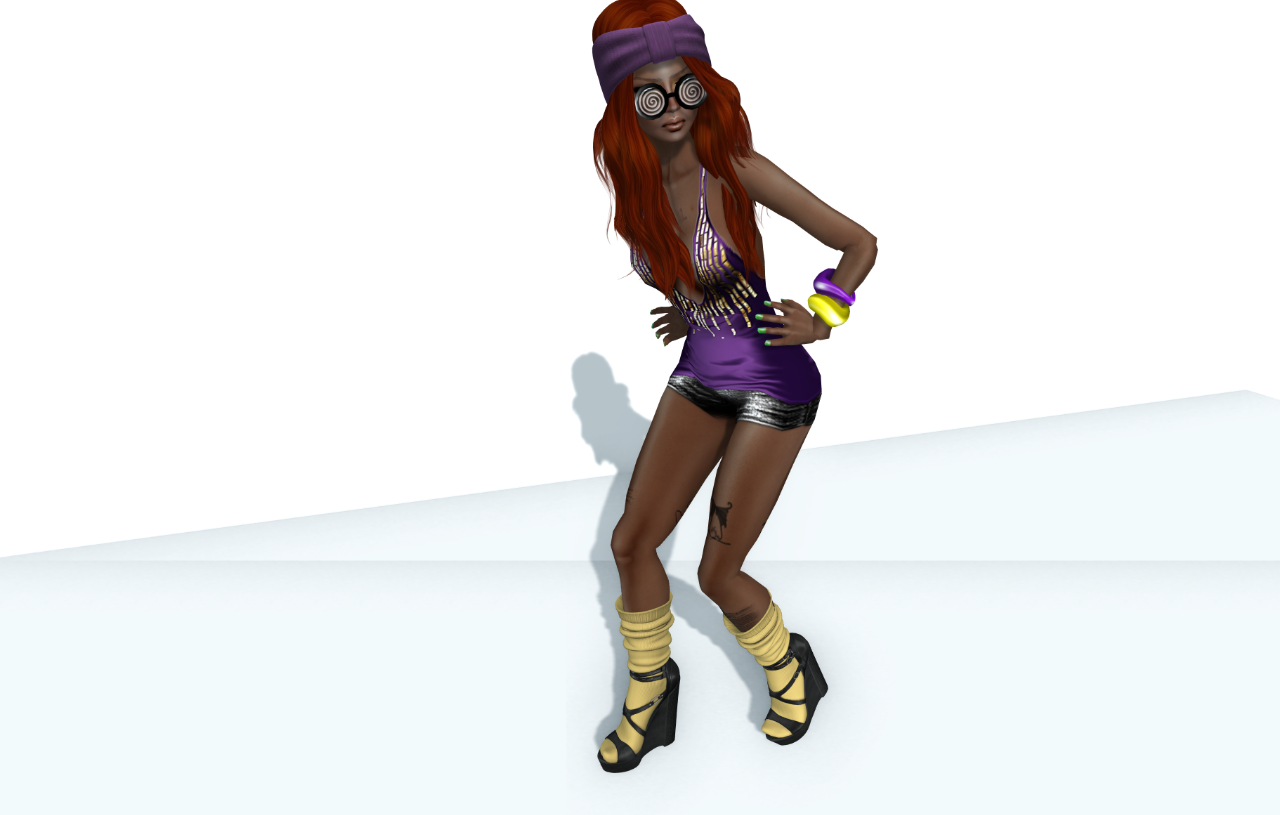
The face behind this:

Photobucket
Be aware that most of the content exposed here are freebies. Besides that I may accept review copies but will only blog things of my taste, won't lie to my readers.Read more info here. For any other questions you may contact me inworld or : My Flickr Plurk I am also human and have a RL. So if I don't blog something for lack of time is nothing personal. Hugsssss.

Pages

Showing posts with label PS SL tutorial. Show all posts

If SL gives you glitches-- play with them -PS tutorial

Here's some raw shot from SL using shadows, unfortunately there's this glitch that makes it look like a double line... So to solve this I did some lines to give something more than a white background and sure hide that line I didnt want. You don't need extra drawing and PS skills and neither a tablet... all you need is some layer play. Hope you enjoy this fun tutorial. :)

1 - Once you have your image cropped on the right size you want it create a new layer. Here is where all the magic will happen.
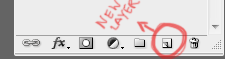


2- Make sure you have the layer you created selected and not the image!! Select one of the colors want to use and select the brush tool. Now draw the lines at your own taste.


3- We want the lines to look like behind the avatar and without covering the shadows. So to do it go to the layer menu and select ''Darken'' or ''Darker Color''.
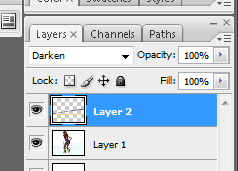


4-Basically, this effect will select the light areas and add the color/texture you want on them. there may be left so dots with colors but all you will do is grabbing the erase tool and take them off.
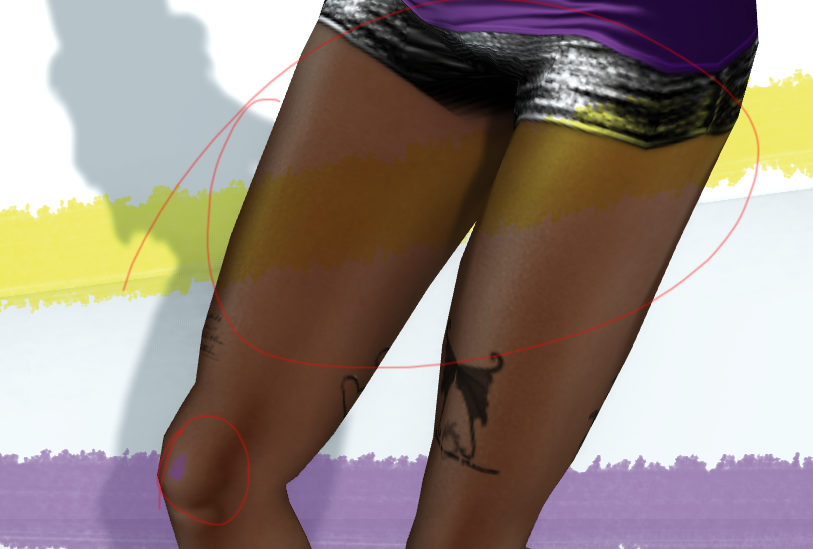


5- After erasing these dots of colors repeat the steps until you have the desire effect. Please be aware this will only work on white or very light backgrounds.


Here is my final piece. :) I am not a photoshop pro or someone with any long experience with it. Just sharing something I found that is quick and can save lot of work.

Have fun!! :D

Credits:
SKIN: Glam Affair - Jadis
LIPS: .:Glamorize:. Attitooth Lips - Fuschia -1L
TOP: erratic / hailey - sequin longtop / purple (gold)
SHORTS: erratic / nikki - sequin hotpants / silver
BRACELETS: erratic / twisted bracelets recolorable /
GLASSES: A:B glass sora - Lucky Board
SHOES: Maitreya Moxie
HAIR: Maitreya Lauren - Charcoal - Subscribo Gift

Photoshop Basics by Steffy Ghost


Greetings all. Just posting some methods I use on my photoshop editings. I am not a pro , you sure can find tones of good tutorials on youtube and so on, but just showing the process I usually do. :] I learnt all I know from fab tutorials around the internet, including some done by Second Life users who do this million times better then me. But hope you enjoy it.

Open the shot you want to edit.


Use this tool to crop the image to the desired size. This one allows you to crop it freely.


- Once you have the image crop selected go to EDIT and select Copy. (or Ctrl+C)

- File- New and now you have a new document where you can Past (Ctrl+V your image).
-Always duplicate layer when editing. That way you have an extra image if something goes wrong.
-To give your image a special color touch on the top select IMAGE --> AJUSTMENTS --> Curves. Just play around with your curves and put your capture on the tone you wish. (There's also other Adjustments that can be also used. I prefer this one)
- Due to multiple reasons SL bodies never have the perfect shape... and some points might not be so well and you may need to reshape them.
Shift+Ctrl+X will open the liquify tool
-@ Liquidy I usually use the Pucker Tool (S). This helps you put in the place some poity edges. (Eg: Knees and Elbows shape). Put the brush on the desired size and just play around. Also the Bloat Tool can be used to 'add' more volume to some body parts.


-As you can see on the image there's some difference in the pic where Liquidfy tool was used.

-After will come the fun part. I guess the best about Photoshop is the layers. Layers can make all the difference and I use several.


-Make sure you have your layers visible on the right side of your screen.
-Now create a new layer. (look at the arrow on the image)
-Next step is creating shadows and highlights. Go to the brush tool (B) and select the white color. Now with the brush just tint around the spots you think that shoul have some light. (Don't worry about how it looks. Paint it normaly).
-So now that you have your highlights you will also need some shadows. Now black color and do the same steps as the white but this time draw your shadows.


-You image will look like this. Not pretty, hein? So here comes the trick now.


-The final step. Be sure you have the layer you made (the one with no image) selected. On the top of the layers scroll down and select ''Soft Light'', you will see your shadows and highlights appear. If you think your highlights/shadows are too heavy go to Opacity and Fill and turn them down to lower levels. (*)


So there are the main steps I take to make my SL pictures. Also remember your good Windlight settings and graphics quality will also help to have less work on photoshop and also make your shots more realistic.